The last step is to add any needed diagnostic information. Diagnostic information can
come from a number of sources. The ECU Diagnostic Database can be accessed from Setup
-> ECU Diagnostic Database.
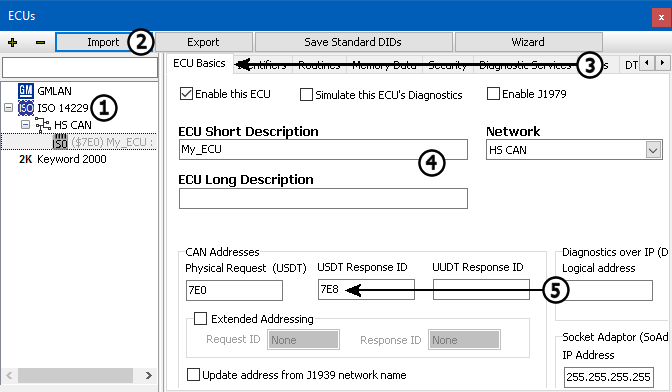
The far left will show a listing of all the ECUs brought in from your
Network Database setup
(Figure 1:  ). Selecting an ECU will display information on
the right.

To import diagnostic data, click on "Import" (Figure 1:  )
and select the database type. The database types are broken in to different types:
GMLAN, ISO 14229,
Keyword 2000, ICS Database, or Memory information. To Import an
ODX type file, select ISO14229, then ODX/PDX. Select the ODX file to load. A converter dialog
will popup identifying any issues in the import, click Ok to move on.
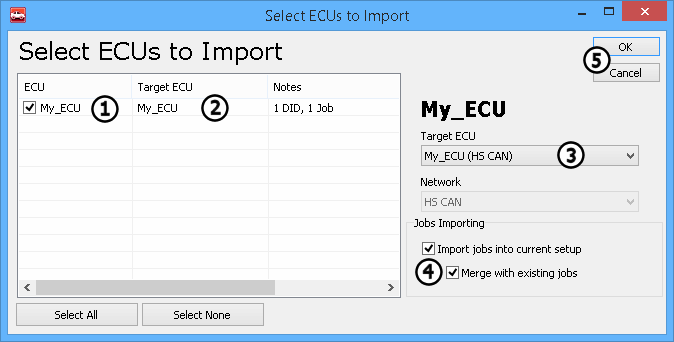
The Import dialog will pop up next. This screen is where the imported data can be mapped to the
available ECU list. The ECU column (Figure 2:  ) lists the ECU names
present in the database that is being imported. The ECU name to link this data to is presented
in the Target ECU column (Figure 2:
  ). If the correct name is not
automatically selected, it can be chosen from the Target ECU drop down
(Figure 2:
  ). Some ODX files have Diagnostic Jobs built in. Import
options for diagnostic jobs is shown under Jobs Importing
(Figure 2:
  ). "Import jobs into current setup" enables
importing diagnostic jobs. The "Merge with Existing Jobs" option will update any jobs
the currently exist in the database. OK (Figure 2:
  ), will confirm
and start the import.

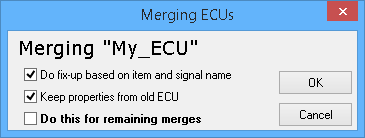
For each ECU with data to import, a Merging dialog will appear (Figure 3). This will ask how to add this new data. The options are explained below:

The last thing to do is to save! Again, this can be done through File -> Save Platform Changes.