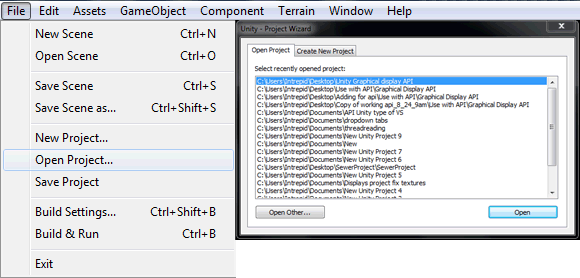
Figure 1 - Opening the Unity 3D Graphics Panel Demo

Unity3D Graphic Display API
Example
Do the following steps to use Unity3D Graphic Display:
First set the scene for running
an .exe file, then an explanation of how the scripts work.
This is the Unity3D Demo in its entirety included to show how the API all works together; The example files are included in the following file: Unity3d Graphics Panel Demo (1537kB)
Figure 1 - Opening the Unity 3D Graphics
Panel Demo
Open Unity3D. Locate and open the project folder called "Unity Graphic display API". (Figure 1)
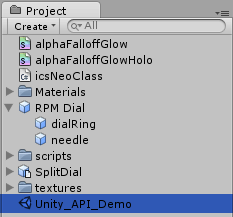
Figure 2 - Checking to see if the
correct scene is open
In the project panel open the Unity scene called Unity_API_Demo. Once opened, in the game view is a place holder for the graphical display. This is where all the data will be visually displayed upon execution of the application. (Figure 2)
Next, locate the icsNeoClass.cs and make sure it is in the correct folder, this imports the .DLL into the project panel (cannot be in any other folder, other then the main "project asset folder").
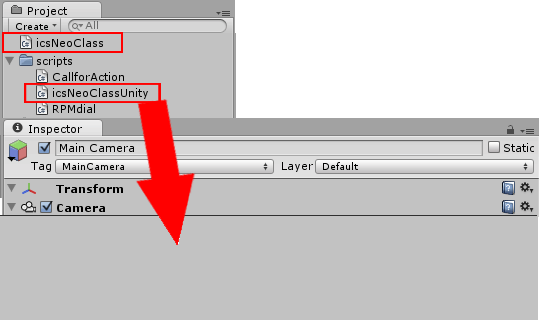
Figure 3 - Placing scripts in the
correct window
Locate IcsNeoClassUnity.cs, located in the Scripts folder. This example script handles the functions of the Intrepid Hardware; open, close, transmit, receive, ect... Then attach the IcsNeoClassUnity.cs on the Main Camera. (refer to figure 3)
The demo should be all set up and ready to play out at this point. Press the play button near the top of the Unity3D windows to enter play mode and begin the demo. (Figure 4)

Figure 4 - The play button in Unity
3D when in play mode

Figure 5 - This is how your Graphics Panel
should look in play mode
| IntrepidCS API Documentation - (C) Copyright 2000-2022 Intrepid Control Systems, Inc. ( ( (( ( (www.intrepidcs.com) |
Last Updated : Tuesday, August 30, 2011