5. RAD-Moon Hardware Setup
Setting up the RAD-Moon is not difficult, but we have provided step-by-step instructions below for those who may be new to the process. Note that while the steps are listed in a particular order so that it’s easier for you to confirm that the correct connections have been made, the exact sequence in which the setup is performed does not affect operation.
The hookup diagram in Figure 5 shows you the RAD-Moon setup at a glance.
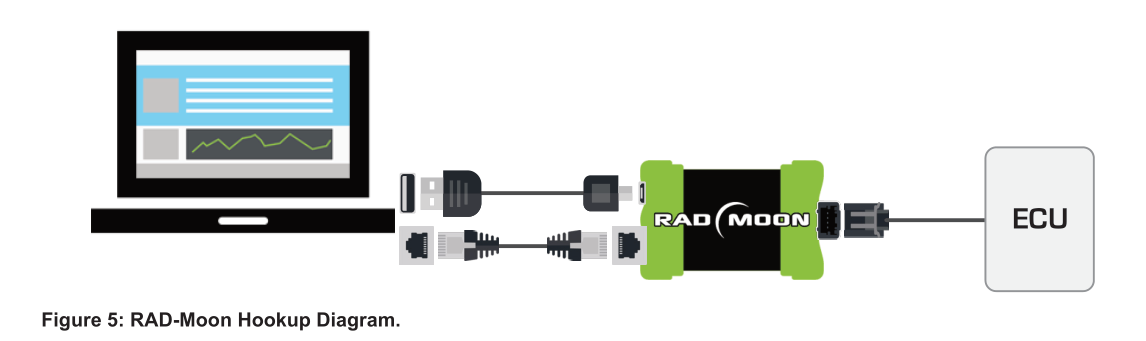
Figure 5: RAD-Moon Hookup Diagram.
Different methods may be used to connect an Automotive Ethernet cable to an ECU. For this reason, we assume in the following instructions that the device to be connected to the RAD- Moon already has its BroadR-Reach cable attached.
- Remove Components from Package: Remove the RAD-Moon, Ethernet cable and USB cable from the RAD-Moon package.
- Connect USB Cable to PC or USB Hub: Attach the larger USB connector on the USB cable to an open USB port on a PC or a USB hub (Figure 6).
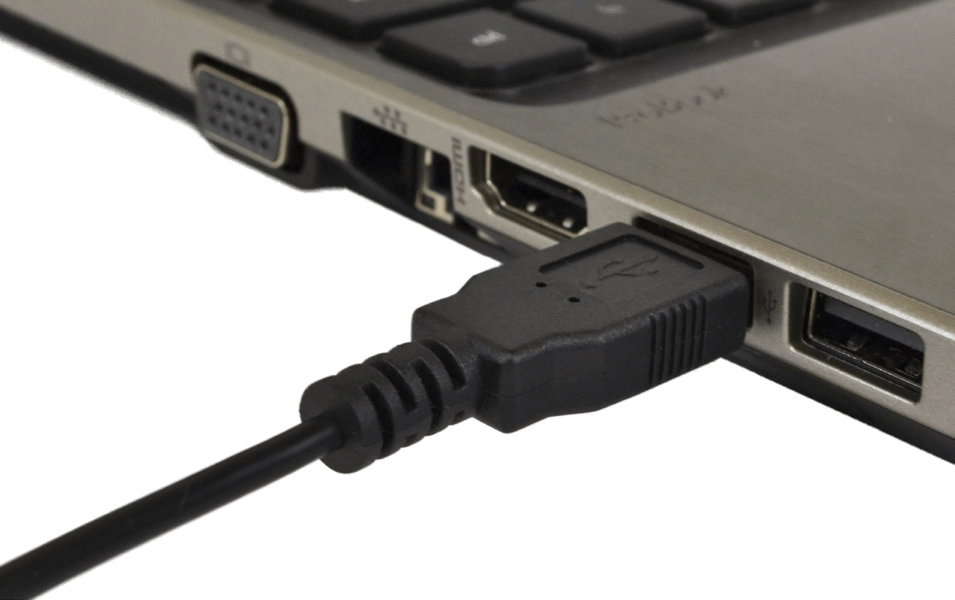
Figure 6: Connecting the USB Cable to a Laptop USB Port. Attaching the cable to a USB hub will also work.
- Connect USB Cable to RAD-Moon: Connect the mini-USB connector on the other end of the USB cable to the RAD-Moon, as shown in Figure 7.
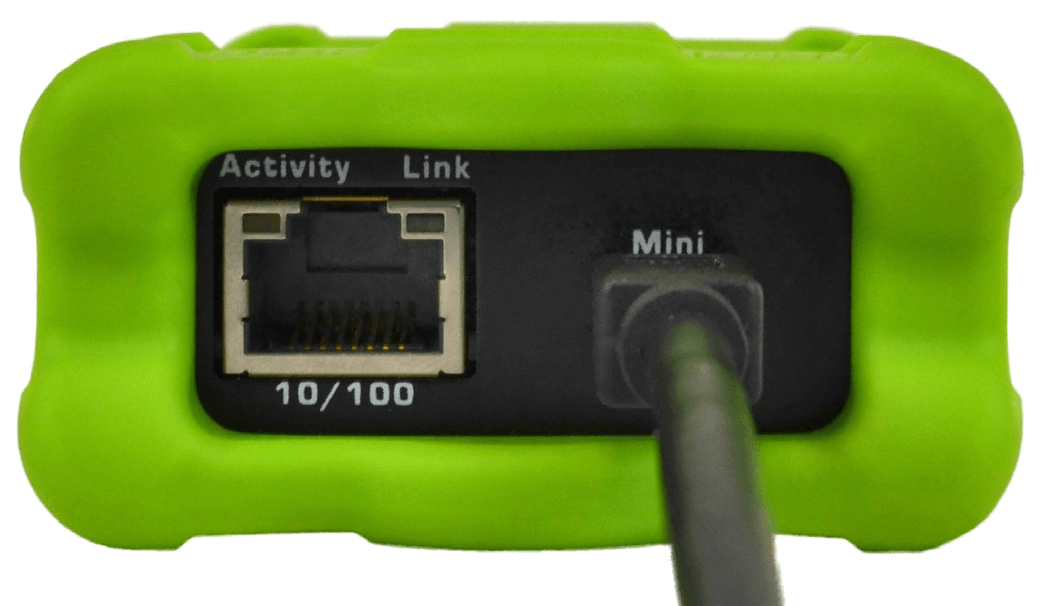
Figure 7: Connecting the USB Cable to the RAD-Moon.
- Connect Ethernet Cable to Ethernet Device: Attach one end of the included standard Ethernet cable to an RJ-45 jack on a PC, switch or other Ethernet device. You should hear a click indicating that the cable is properly seated in the jack (Figure 8).
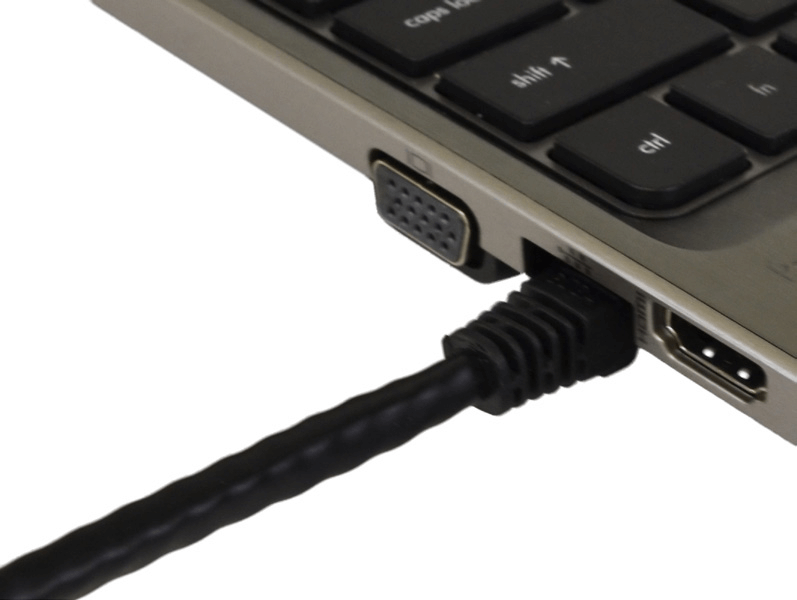
Figure 8: Connecting the Ethernet Cable to a PC. You can also connect it to an Ethernet switch, hub or other standard Ethernet device.
- Connect Ethernet Cable to RAD-Moon: Attach the other end of the Ethernet cable to the RAD-Moon’s standard Ethernet port, as shown in Figure 9; you will again hear a click. If the PC or other Ethernet device is powered on, you should now see the Link LED light up and remain lit; the Activity LED may also begin to flash.

Figure 9: Connecting the Ethernet Cable to the RAD-Moon.
6. Connect BroadR-Reach to RAD-Moon: Plug the Mini50 connector on the BroadR-Reach cable attached to the Automotive Ethernet ECU into the matching socket on the RAD-Moon. The green Link LED will illuminate, and you may see the Rx and Tx LEDs light up as well.
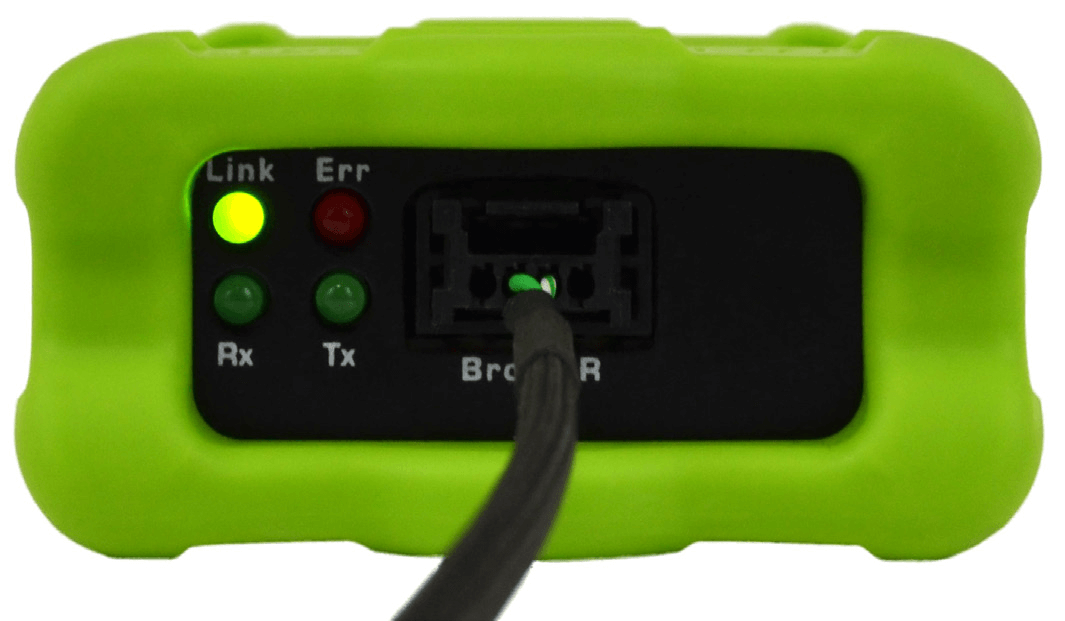
Figure 10: Connecting the BroadR-Reach Cable to the RAD-Moon.
Congratulations, your RAD-Moon is now ready for operation!
If you experience any issues setting up the hardware, please refer to the enclosed troubleshooting and support information.