 Graphical Panels: Select and Work With Panels
 Graphical Panels: Select and Work With Panels
There are several features to help you work with the various panels that comprise a complete Graphical Panel application. These are controlled via a set of buttons located below the main toolbar; an example can be found in Figure 1.

Table 1 illustrates and explains the function of the various panel control functions seen in Figure 1.
| Button | Icon | Description |
|---|---|---|
| Show/Hide Toolbar | 
| Toggles between showing and suppressing the bar containing panel tools. |
| Show/Hide Properties | 
| Reveals or hides the Properties Toolbar on the right side of the graphical panels screen. |
| Select Panel | 
| Makes the selected panel active. |
| Move Panel Left | 
| Moves the currently-selected panel left in the panel list. |
| Move Panel Right | 
| Moves the currently-selected panel right in the panel list. |
| Import Panel | 
| Loads a previously-saved panel into the current graphical panel set. |
| Export Panel | 
| Exports a panel to an external file. |
| Add Graphical Panel | 
| Adds a new Graphical Panels window to the Vehicle Spy setup. This will not create a new individual panel, but actually an entire new set of panels, for complex setups. |
| Lock/Unlock Panels | 
| Switches the Graphical Panel between edit mode and interaction mode. |
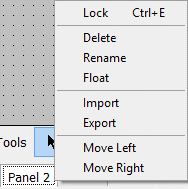
Most of these buttons can also be accessed by right-clicking on any of the panel tabs to bring up a context menu (Figure 2). This menu also allows you to delete, float or rename a panel.
